Tuesday, June 29, 2010

Nifty Thrifty Tuesdays, Refinished Coffee Table …


In the beginning of spring when I began cleaning out the flowerbeds my daughter Abbey claimed a little spot in our mint garden and called it her house. Our mint garden runs along two sides of our house and is surrounded by a little fence and a gate. She was constantly running in and out of the garden and playing in it. Whenever someone would stop by she would show them her house.

All that was in her house was a wooden walkway, mint, sage, and some pumpkin seedlings, but she loved it and was so proud to call it her own.

I decided I was going to fix it up a bit for her. I had a coffee table in the basement that I had bought years ago at a flea market for maybe five dollars. I decided that would be her little bench. I also wanted to make a rug to set the table on so it would not get all muddy when it rained. I went through some left over wood we had in the basement to make a rug for her table.


My husband helped me put together the rug. We took a piece of plywood and nailed some left over boards around the bottom to make it sturdy. Then we took some left over canvas I had from a large commission piece I had done several years ago and wrapped the plywood. Once it was together I primed the rug with left over black paint we had. After that was dry I took acrylic paint and painted the rug design on the canvas. Lastly I sprayed the rug with a protective varnish I use on my paintings. Total cost of the rug zero dollars.


The first thing I did to the table was go over it with sandpaper. I wanted to get as much varnish off of it as I could so the paint would adhere to the table. After it was sanded I put several coats of left over white paint we had onto the table. I think it was our living room ceiling paint. Once that was dry I painted Abbey’s little pink house on the table. The last thing I did to complete the piece was spay it with a protective varnish. Total cost of the bench project five dollars.


She was so excited when it was finished. She loves to play in her little house. Abbey is so proud to have her own little spot.

Please stop over and visit Coastal Charm and all her thrifty followers for, Nifty Thrifty Tuesdays.


Monday, June 28, 2010

MMM Monday, Pesto Sauce …

For the past couple of years one of favorite herbs to grow has been basil. It is a very easy plant to grow and the culinary possibilities are endless.

Yesterday Michael created several mouth watering dishes all containing his homemade pesto sauce. He incorporated it in a delicious mayonnaise that was used on a savory steak and focaccia sandwich. Threw together homemade pesto raviolis. And finally used the remaining sauce to create a cold pesto ravioli salad with diced roman tomatoes Parmesan cheese.

Here is the basic pesto recipe.

Happy cooking!
Pesto Sauce (makes 1 cup)
Ingredients

2 cups fresh basil leaves, packed
1/2 cup freshly grated Parmesan-Reggiano or Romano cheese
1/2 cup extra virgin olive oil
1/3 cup toasted pine nuts
3 medium sized garlic cloves, minced
Salt and freshly ground black pepper to taste
Method

1 Combine the basil in with the pine nuts, pulse a few times in a food processor. (If you are using walnuts instead of pine nuts and they are not already chopped, pulse them a few times first, before adding the basil.) Add the garlic, pulse a few times more.

2 Slowly add the olive oil in a constant stream while the food processor is on. Stop to scrape down the sides of the food processor with a rubber spatula. Add the grated cheese and pulse again until blended. Add a pinch of salt and freshly ground black pepper to taste.


Saturday, June 26, 2010

Friday, June 25, 2010

My Three Little Terrarium Paintings …

I am so excited I completed three little paintings this week. I did the sketches for these paintings quite a while of go. Unfortunately I have been having quite a creative drought the last few months, ok probably six months and did not have the drive to paint them. It felt so good to create something.

The first painting is a ball jar terrarium. Inside the ball jar is a little pink house, two trees and six decorative buttons, oh and of course moss.


The second terrarium is setting on a potato masher. Inside this mini terrarium is a decorative mushroom, cute little buttons and hanging off the masher is a vintage owl ornament.


The last little terrarium is a vintage syrup pitcher. Inside the terrarium are two pretty little pink brush trees, a cute white house, moss and buttons. Hanging off the terrarium is a bright butterfly clip.

All three of these paintings will be added to my Etsy shop in the next several days. My Etsy shop has been sitting stagnant for the last couple of months, it will be nice to breathe some new life into it.


Thursday, June 24, 2010

Antique Musical Photo Album …

Today I am participating in Vintage Thingy Thursday over at Coloradolady . Suzanne has a beautiful blog and today she is sharing her space with a bunch of vintage loving bloggers. If you are interested in seeing some beautiful antiques and unique vintage items stop over and visit.


Since it’s my first time linking up I wanted to share a very special antique. This musical photo album was given to me after my great-grandmother passed way. This beautiful album was my first antique. It is a little warn at places but I think if I was over hundred years old I would be too. The patent inside dates back to November 10, 1896. The music box still plays beautifully although I am not sure of the name of the song.


The album itself is full of beautiful photos of ancestors whose names I’m not sure I will ever know. I do know there are a few pictures of my grandfather, great-great-grandmother, and of my great-great-uncle.

One day I will have to bring out the album when I see my grandfather and see if he can help me put some names to faces.

There are so many beautiful pictures in the album, here are a few of my favorite photos.


I also found this in the album drawer along with a few other pictures. I think it’s adorable, I wish I knew who the women was in the picture.


Have a beautiful Thursday.


Wednesday, June 23, 2010

Rednesday, A Touch of Red ...

Today I am linking up with It's A Very Cherry World! for Rednesday. I love the color red especially red flowers. One of my favorite perennials is, Monarda Jacob Cline Bee Balm. When we first moved into our home my mother was kind enough to share her perennials with us. Over the last eight years the Monarda Jacob Cline Bee Balm has multiplied, spread and definitely become one of the most vibrant flowers in my gardens. The blooms are full of character.

I think they look like brilliant red fireworks.


On Saturday we picked an assortment of berries and sweet cherries. The cherries were so good. They were definitely my favorite fruit that we picked Saturday.


They are not only delicious but adorable too.


The last two red items I am going to share are my little vintage red bird ornament and one of my white and red enamel bowls. I love enamel ware especially the pieces with red trim. This little bird is one of my favorite vintage ornaments. He is a little warn and has had his wings glued on several times but I think he is so cute.


Monday, June 21, 2010

Adorable Vintage Vases …

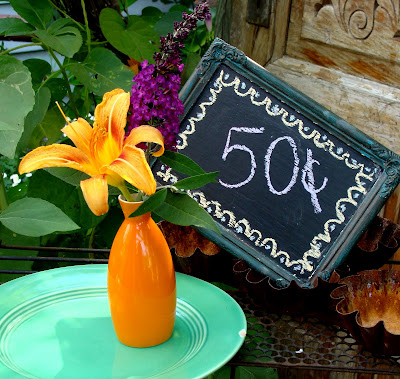
I adore little vintage vases. They are one of my favorite vintage items that I collect. I love filling them with the colorful flowers from my gardens. I paid a measly dollar seventy-five for these three beautiful vases.

I am participating in Nifty Thrifty Tuesdays over at Coastal Charm .
Stop over and visit this beautiful blog and check out a few more thrifty shoppers.


MMM Monday, Raspberry Custard

On Saturday we went picking berries at a local farm. We picked red raspberries, black raspberries, blueberries, and sweet cherries. The kids had a blast; I think Abigail ate more blueberries than she put in the bucket.


Of course their favorite part was eating ice-cream after we were finished picking the fruit, ok it was my favorite part too.


Michael made several delicious pies with the fruit we picked, a cherry crumb pie, a colonial style mixed berry, and a raspberry custard.


Here is the yummy raspberry custard recipe.

Happy baking!

Pastry Crust:

2 cups all-purpose flour
½ cup toasted slivered or sliced almonds
1 teaspoon salt
1 tablespoon granulated white sugar
1 cup (2 sticks) unsalted butter, frozen, and cut into 1 inch pieces
1/4 to 1/2 cup ice water
Filling:

3 eggs, beaten
3/4 cup white sugar
1/4 teaspoon salt
1 teaspoon vanilla extract
2 1/2 cups heavy cream
1/4 teaspoon ground cinnamon
2 cup fresh raspberries


Pastry Crust:

In a food processor, place the flour, salt, almonds, and sugar and process until combined. Add the butter and process until the mixture resembles coarse meal (about 15 seconds). Pour 1/4 cup water in a slow, steady stream, through the feed tube until the dough just holds together when pinched. Add remaining water, if necessary. Do not process more than 30 seconds.
Turn the dough out onto your work surface and gather it into a ball. Divide the dough into two equal pieces, flatten each portion into a disk, cover with plastic wrap, and refrigerate for 30 minutes to one hour before using. This will chill the butter and allow the gluten in the flour to relax.
While the pastry is chilling, line two baking sheets with parchment paper. Once the pastry has chilled sufficiently, remove the two disks of pastry from the refrigerator and divide each disk into four equal portions (you will have eight portions altogether). On a lightly floured surface, roll each portion of pastry into a 7 inch circle. Place the eight pastry circles (four on each sheet) onto the prepared baking sheets and cover with plastic wrap. Place the covered baking sheets in the refrigerator to firm the pastry while you prepare the filling.


Filling:
In a large bowl, combine the eggs, sugar, cinnamon, and vanilla. Slowly add the cream being careful not to incorporate too much air. Add the raspberries to the unbaked pie shell and then pour custard over top. Bake for 30 to 35 minutes in a 400 degree oven, or until a knife inserted near center comes out clean. Cool on rack.


Saturday, June 19, 2010